This morning saw both of us down at the allotment again. I can’t remember the last time we were both down two days running! Determined not to waste the momentum from yesterday, we grabbed the ladder and made a start. The final three panels went up relatively easily although the apex panels proved much more tricky. The middle apex panel in particular wouldn’t play ball.

Our next step was to secure the bottom of each panel on both sides of the coop. With my husband up on the ladder, my role was to hand up nails and to give advice on where to put in the next nail. We battled through a light shower and finally reached the last panel. As the last nail went in, we gave a cheer! Finally, the new roof was in place!

The next stage of Flockdown preparations I could tackle on my own so my husband pottered off home to have a well deserved break. My next job was to block off the apex section of by Mick the Greek’s coop. This section of the coop is protected from the weather by virtue of being behind Mick’s coop. But that corner has been the main entrance point for the gang of sparrows as without roof panels it was almost impossible to barricade them out. We have tried netting, the greenhouse shield and nothing worked. Whatever hole I blocked up, the sparrows found another one. It has been a two year long battle and although the sparrows have had the upper hand, with the new roof, the tide will turn! Using a 0.5cm wire, I cut it to fit the right hand side of the apex gap. Wobbling on the ladder at full stretch, I managed to wrestle the wire underneath the edge of the roof panel before hammering metal staples to secure it into place. At the bottom, I used cable ties to make sure there wasn’t a single gap for any marauding sparrows. At the corners, I cut the wire to bend it tightly around the edge of the coop. Each corner has gaps and wrapping the wire around blocked these off.


I repeated the process for the left hand side of the apex gap which took some time but I was pleased with the result. After shredding my hands and arms on the wire, I decided to take a break and work on filling the ridges of the roof panels. These small tunnels are the perfect size for unwanted feathery visitors to squeeze through. Proper allotmenting values recycling and reusing and I advocate for reusing as much as possible. The hundred weight of scaffolding netting we removed from the Main Coop could be used to plug the ridges and, assuming there was enough left over, to go around the New Coop.
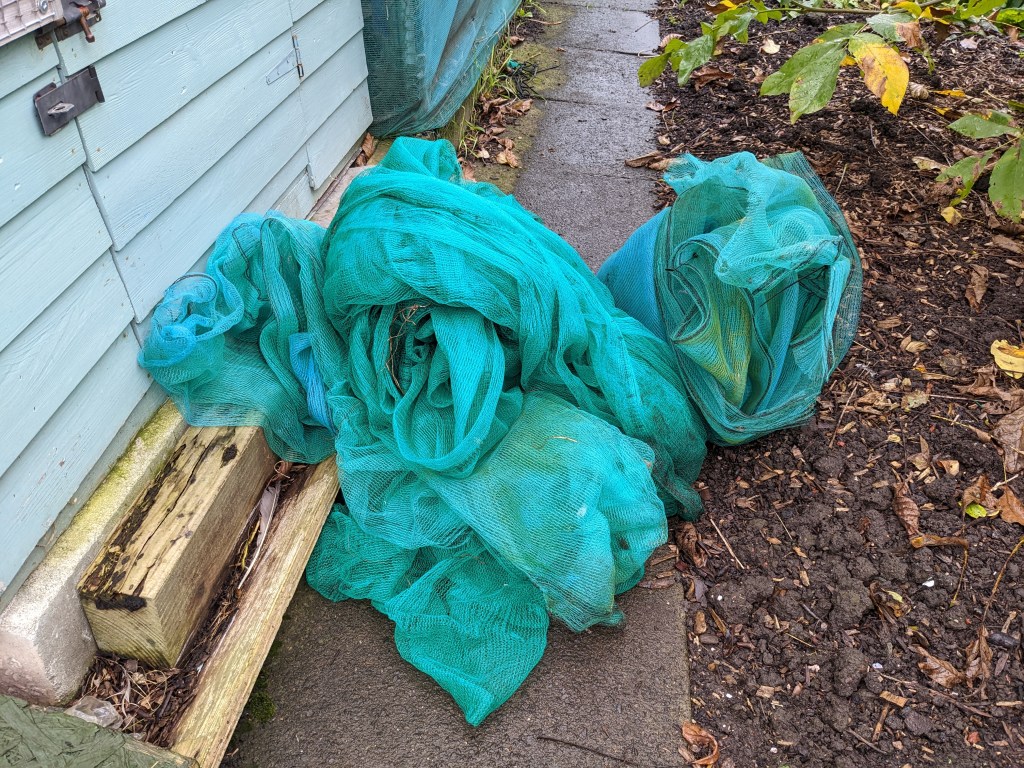
Plugging all the ridges took ages as I wanted to make sure the netting fitted tightly into the ridge. Previously, the netting had been blown out by the wind which I think was partly due to not packing the ridges fully. Much to the amusement of Rey and the gang, I spent the time running from the inside to outside of the coop to make sure the ridges were properly blocked. It’s only when we have a good wind will I know if my efforts have been in vain!

Next I tackled the front apex gap. Irritatingly, I discovered I wouldn’t have enough wire to do both sides. In the end, I decided to use the wire on the Nest House side as the gap at the corner was bigger than on the other side. This section went in surprisingly quickly until it came to the staples. With the roof panel so close to the wire, there was almost no room to get a hammer in. What’s more, there definitely wasn’t room for a hammer and several fingers needed to hold the staple in place. Perseverance was key and I got it all done in the end although not without catching my fingers with the hammer on several occasions.

The last apex gap had to be filled by a section of scaffolding netting. I decided that if it was taut, it would keep the birds away. The staples again proved difficult but the netting wrapped around the corner of the coop blocked out any potential entrances rather well. At the bottom, I trimmed the netting before adding the cable ties either side of the door. However, the netting over the door needed to be removed so that you could go in and out. Over time, the door has dropped on one side, leaving a sparrow-shaped gap. I realised that if I made two vertical cuts in the netting at the sides of the door, the flap it created could block the gap at the top of the door! I tried it several times and it seemed to work quite well. Feeling rather pleased with myself, I moved onto the new coop.

The New Coop had an unwelcome visitor when I arrived and I watched it carefully to see where it chose to leave. The wire has much bigger holes in it where the coop attaches to the nest box. Unsurprisingly, the sparrow hopped out through there. So out came the netting and cable ties. The bottom section of the new coop was fairly straightforward although I was beginning to worry about losing the light. Getting the new tarpaulin onto the roof was a nightmare. Each time I got it up, the wind blew it off. After the fifth attempt failed, I called my husband to help. Just before he arrived, I cut all the cable ties and shifted the tarpaulin to one side as the tarp wasn’t fully covering the roof.
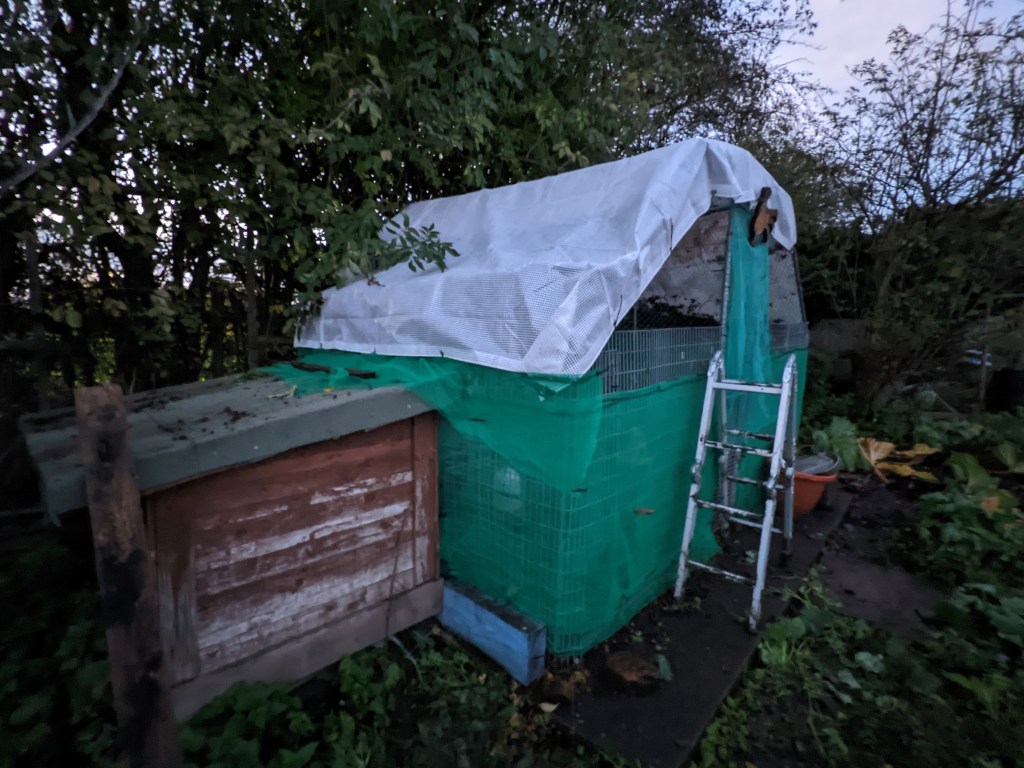

When my husband appeared a few minutes later, we got it up and I worked around the coop to get it tied down into place. By now it was pretty dark and I was rather hungry, not to mention completely covered in dirt. The last job for another day is to finish off the netting on the new coop which hopefully won’t take more than a couple of hours. But even without the netting, the coop is biosecure, just in time for tomorrow’s Flockdown!
Here’s hoping that we won’t have to keep the girls in Flockdown for five months like last year!

Leave a comment