So today was the day for the long overdue cleaning of the coop. I always dread this job as it usually takes me a couple of hours to do it properly and includes time for drying.
As far as I can remember, I haven’t explained how I clean the coop. So here it is…

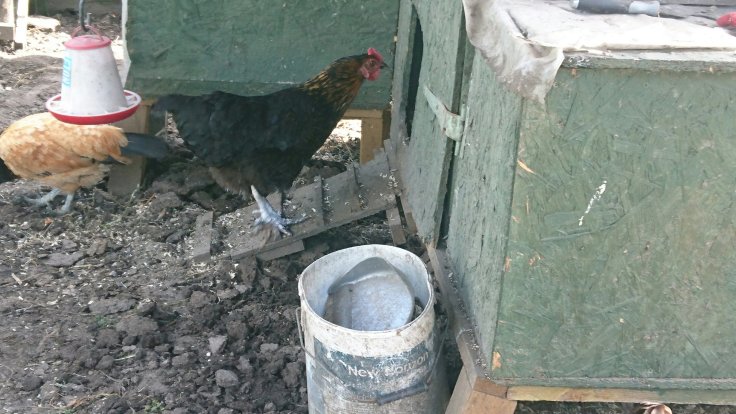
The first part is to distract the chickens and tempt them out of the nest box by feeding them. Any rattling of the storage bins or even glancing over to them usually results in a melee of chickens fighting to get near the food. Daisy as usual, takes it one step further.

Once successfully distracted, I opened up the nest box fully. Both lids of the laying boxes and the roof of the nest box which forms the main part of their home. Remove all old bedding (we use wood shavings rather than hay/straw as we find it less messy). This takes time to do completely. Geoff, who designed and built our nest box, has drilled a small hole in each laying box. This is to provide some ventilation but it has the added use of being a convenient hole to brush the last few bits of old bedding out of. I tend to use a brush and a dustpan to remove the bedding before sweeping any remains down the hole.
Next, I fill my cleaning container with water from the tap and mix in anti-mite fluid. This can be bought from pet shops in a concentrated form which should be diluted in water as per the instructions on the packaging. Every brand will, invariably, be different. Put into the water all perches and any removable items from the nest box. Our nest box has two perches inside as well as 8 boards that go underneath the perches to aid daily cleaning. All of these bits go into the water. I scrub the boards front and back to rid them of any detritus before laying them out in the sun to try. The perches need to soak in the water as mites have a nasty tendency to live in the ends of perches. I usually try to soak each end of the perch for an hour to kill off any mites.

Whilst the perches are soaking and the scrubbed boards are drying, I go back to the nest box armed with my favourite mite extermination weapon – a spray bottle full of anti-mite fluid. After shooing away inquisitive chickens (usually Evie or Fizz although today each one of them took a turn!), I started to thoroughly spray every inch of the inside of the nest box. Pay particular attention to corners and small nooks which is where crafty mites like to hide. Once I have sprayed the inside, I turn my attention to the perch on the roof and the other perches in the coop. When every bit of perch and wood is damp with anti-mite fluid, I usually take a well deserved break whilst the inside dries. Gloriously today, this coincided with the ringing of the tea bell.

All the usual suspects were present at the clubhouse today and we had a quick chat whilst I downed my drink – coop cleaning in the sunshine is hot work! I must also say a big thank-you to Mel who gave me a cut down water butt to wash the perches and boards in. It holds more water and the bigger capacity meant I could soak and clean all my boards and perches together rather than endlessly swap one for another like I did with my washing basin.
Onward, ever onward! The interior dry as well as the boards, it’s time to reconstruct the nest box. I replaced the mesh that covers the drill holes to stop vermin breaking into the nest box before replacing the boards. In the laying boxes, I replaced the board that covers the drill hole before sprinkling a good amount of diatumous earth. This is an incredibly important part of mite control – it dries them out and kills them. I cover the diatumous earth with a thick layer wooden shavings. For good measure I sprinkle a bit more diatumous earth on the top.
Lastly, I replace the internal perches. These I put into their slots and coat the ends fully in diatumous earth. By this point, I am usually wrestling with several inquisitive chickens who are determined to inspect my work and pronounce it sub-par. It’s an interesting sight, the top half of me in the nest box, the bottom half trying (and failing) to block the chickens from entering the box.

By this point, I give up and shut up the nest box and go for a well deserved break at the clubhouse followed by a long shower!

Great post on cleaning the chicken house. How often do you do that? — Dan
LikeLike
Usually it should be once a month but sometimes it stretches a bit longer.
If the mites are bad as they occasionally are, then I do a thorough clean out every week for about 3-4 weeks to catch the newly hatched mites and kill off any eggs.
We have tried fumigation, different sprays and fluids to clean the coop but my current method is as effective against mites as any. The main thing is to keep on top of it and do it regularly!
LikeLike
Loved this step by step coop cleaning post. I’m a newbie chicken owner and you don’t find anyone actually telling/showing how to do it! Extremely helpful, thanks.
LikeLiked by 1 person
Thank you! I am so pleased it’s helpful to others. Have a look at my chicken pages to see what we feed our girls and some more general information
LikeLiked by 1 person